PLEASE DONATE. I recently had 2 surgeries, do not have health insurance and live on Social Security. I will be delighted to share with you if you will appreciate how much time and knowledge this takes. Thank you. Linda
Check out my other blog http://teacupmilliner.blogspot.com/


Make these wonderful shoes and design them in your own taste. You can use them as ornaments, gift card holders, refrigerator magnets,, decorations for your books, or whatever you love to use them for. They are a good size, 6" long.

I used one with a raised pocket front to hold up my shopping list paper on the refrigerator and the pocket holds the pen. You can leave fun notes in the pocket for when the kids get home for school.

You can buy magnetic sheets at your local craft store and I die cut 2 sizes of circles and glued them onto the under sole.

I made a pair of shoes and glued them onto a fun and funky book cover I made for a school composition book. To learn how to make a book cover, visit this blog.

The pockets are the perfect size to hold a gift card or even a hand written note. Attach the ribbon on top of your wrapped gift with a small piece of tape and pop the note into the pocket. By adding a ribbon hanger, these shoes can be hung up as room decorations or door knobs to show off your idea of color and fashion.
I am so happy to get away from thinking up ideas to use up my daughters old CDs she was going to recycle. After a few days and three blogs, I managed to make 24 CDs disapear. I still have a stack left and she told me she hasn't cleared then all out yet, but I need a break. This time another idea popped in my head that would be great for older kids to do while they are off school. They can use up scraps of Mom's or Grandma's fabrics and card stock, without spending money.
This project was so much fun I could have made many, many of shoes, but I had to stop somewhere. My purpose for this blog is to bring people back into the world of enjoying crafts and sewing and I have to continue forward with more of my ideas.
Drawing a pattern and making a graph.

You see my graphs after I have sketched, cut out and re-sketched many times until I like what I see. I put my designs on graphs I draw in 1" squares, so that you can recreate them. You can learn more here. http://linda-allfreepatterns.blogspot.com/2010/07/graphs-glues-stuff-i-use.html
Don't be afraid of drawing out graphs. I learned this way from old craft books when my daughter was very small and it served me well. Everything comes easy when you do it more than once.

Once you have your pattern the way you like it, cut it out and on the side showing mark it as your pattern and put on it either right or left. Turn it over and mark the opposite foot. This will stop you cutting out wrong pieces later and your shoe parts will match. Then either on tracing fabric or paper, make fabric patterns by drawing around your shapes and then leaving 1/2" all around. Turn them over and mark which foot it is on the other side. You need paper or tracing patterns so that you can pin then onto fabric.

To make your first shoe I am teaching this tutorial using the pocket shoe top, because it is the most difficult to make. (don't worry, it is really easy) You will need a cardstock sole and a pocket top, a fabric sole and a fabric top. I am using red satin for the sole and red sequined sating for the pocket top.

On the sole fabric side, using glue around the cardstock edge and sparingly over the center, then add the fabric. Turn it over and cut slots all around. You cannot skip this step because the fabric will not lay properly if you do. On the top of the shoe, do the same to add the full piece of fabric first, then turn over, clip all around, but ONLY glue down the top of the shoe.

It is time to glue the top of the shoe to the under sole, but because it has a pocket, it is necessary to glue only a part of the shoe as shown in the photo and then let it dry thoroughly before continuing.

When completely dry, pull the remaining shoe top around to fit and glue the rest down. It will try to pull apart, so hold it with a clothes pin until it has dried.

Turn it over and you have a shoe with a pocket top.

I decided to make this shoe very elegant to use on my refrigerator, so I cut a 4" piece of Marabou trim and glued it onto the shoe at the top edge.

I held it at each side with 2 clothes pins until the glue was dry because Marabou tends to want to spring loose.
PLEASE NOTE. YOU DO NOT HAVE TO PUT A FELT SOLE ON THE BACK IF THE SHOE IS GOING TO BE GLUED ONTO SOMETHING ELSE, SUCH AS A BOOK COVER.

I drew around template on red felt and cut out the sole bigger than the pattern.
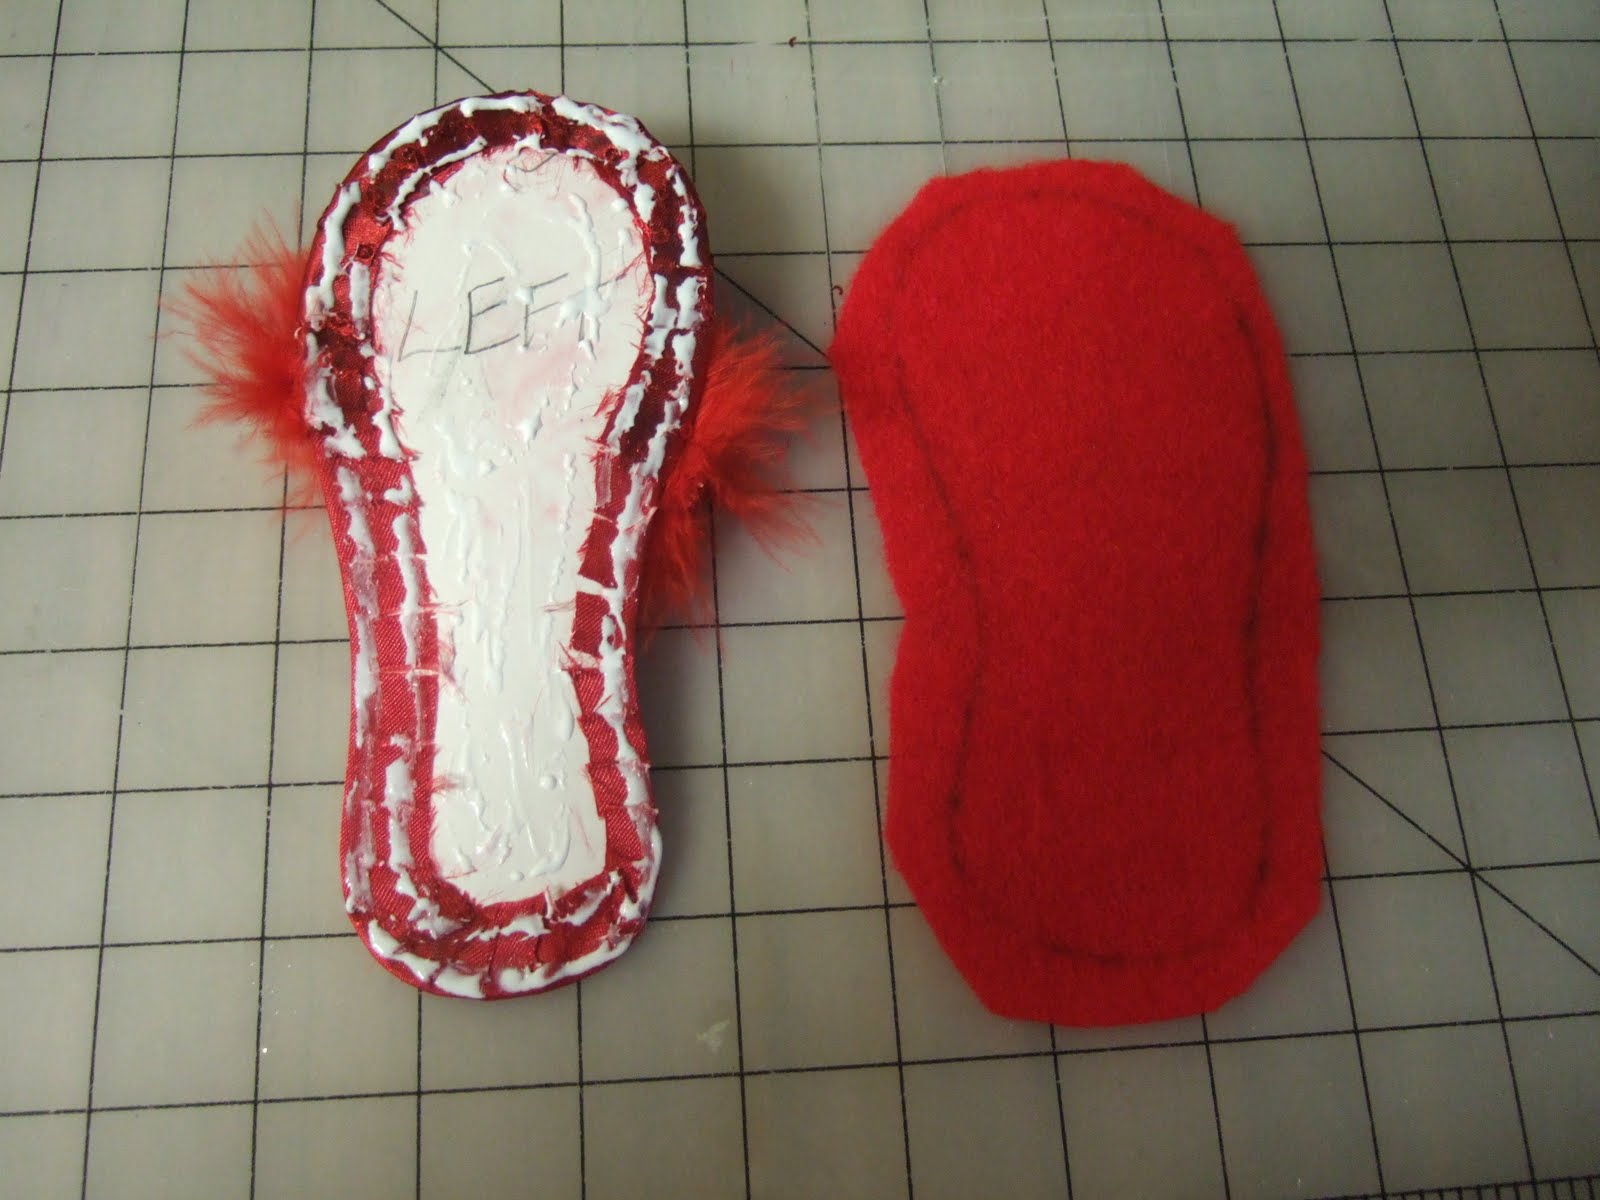
I glued around the edge of the under side of my shoe and then added glue in the middle. You don't have to cover every inch of the center. Then I turned my felt over and pressed it on the shoe.

I then trimmed the extra felt from around the shoe for the perfect fit. This is easier than trying to match a cut sole to fit the shoe. You have a finished shoe.
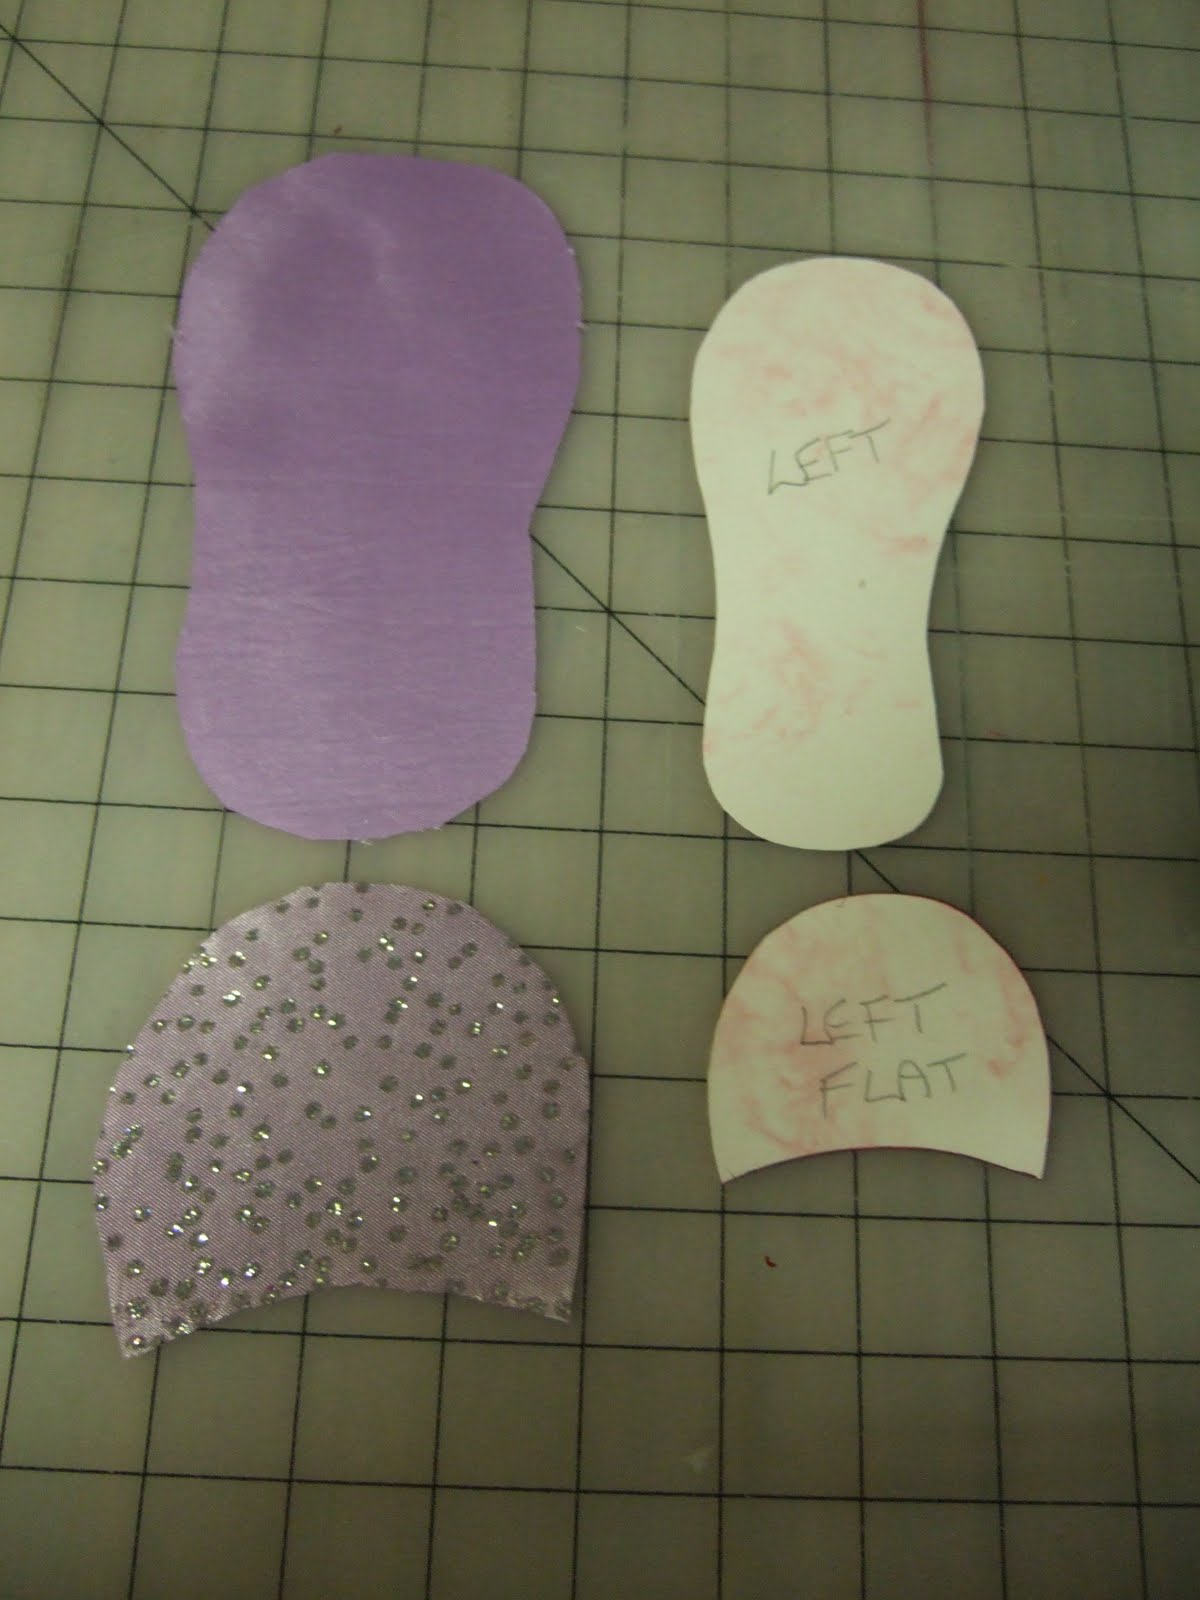
The flat topped shoe is very easy to make. Once again you will need 2 cardstock pieces and 2 fabric pieces as shown above.

Cover the sole and top the same as before.

This time the top can be attached to the sole all in one go, because it matches perfectly.

I made a pair, making sure I had the cardstock pieces going both directions before I glued the fabric pieces on. I trimmed the shoe tops with lace and glued on a clear Cabochon stone in the center for a snazzy look.

I did not add a felt under sole because I planned to glue them onto a book cover. See photo above.
Now that you have had a go at making these shoes, you can design and experiment even more. I took the flat shoe top pattern and made two more styles quite simply. I am not showing you the graph because I want you to try your hand at taking this to another level.

This photo shows you what I did. I took the flat pattern (shown at the top of the photo) and added a point at the top. I played until I thought it looked right, then made the tracing fabric pattern. Then I decided I wanted to make an open topped shoe, so I cut out the sides as shown, then made another fabric pattern.

You can use more than one fabric at a time to make your shoes more unusual. I had a piece of sheer black net fabric with a red sequin design stitched all over, so I cut another top piece of red satin to go under it.

I covered the sole in black satin for contrast, then glued the red satin top down under the top as before. Then I laid the sheer fabric over it and put small dabs of glue all around the outside and let it dry. You can see the sheer remains loose at the top. When it was dry, I glued the sheer top down over the red part the same as before.

I turned the shoe over and glued the sheer and satin sides down and held it in place with clothes pins. You don't have to do this with one piece of fabric but 2 pieces or stiff fabrics tend to want to come loose without holding them in place. While it dried, I cut a 9" piece of ribbon and glued it at the top to make a hanger.

The finished shoe looks like this and I thought it was quite beautiful without adding anything else except a black felt sole.

For the open shoe I decided to use cotton fabrics to see how they would work. Cotton is actually easier to work with that fancy fabrics. I had a purple cotton fabric with glittery bits all in it, so I covered the sole in it. I found a darker plain cotton purple for the top, so glued the cardstock piece on both.

I decided to glue purple sequin trim on the shoe top, but I was afraid I may get glue on the sole. I solved that problem by slipping in some scrap cardstock before gluing.

The sequin trim made the plain cotton shoe much more glamorous and the open toe shows off the gift card perfectly.

I constantly buy remnant pieces that I think will make a beautiful hat, and I have a wide variety of beautiful brocade fabrics with an Oriental/Asian look. Although I love these fabrics, they are often in colors that are difficult to match with plain fabrics available. To solve this problem, I reverse the same fabric for two looks. This one is in a olive green and light gold. It has a lovely border and an all over design on the remaining fabric. The photo above shows you what the under side looks like when laid against the 'right' side. You have colors that are different but the dies match perfectly.

I cut the sole using the 'wrong' side of the fabric and the top on the 'right' side with the border as the main part.

I made this shoe using the pocket top and the fabric makes the shoe so lovely, it didn't need any other trim. I didn't have any ribbon to match either color, so I used gold crochet thread for the hanger.

I made the under sole out of a light green felt.
See other projects I've done by reversing fabrics.
You can use any fabric including sheer fabrics if you take your time and don't drown the fabric with glue.

I purchased this read and black flocked fabric in last years Christmas sale and you can see it the top part that is holly and berries. I laid the cut shoe top on top of cardstock below the fabric, to show you that it is definitely sheer. The holly looks gray over the cardstock.

The gift card shows through the fabric as you can see. You make the shoe the same way as if the fabric wasn't sheer. I used four hot fused tiny rhinestones where the berries are.
Now try your hand at designing shoes and send me your photos via email. Address at the top.

If you loved this project, check out my fashion plates. Here's the link.
Why I Play at making things so easily.When I was a kid, my family didn't have any money and I was the forth down of eight children. TV was scarce, and the weather in England wasn't conducive to playing outside most of the year. We entertained ourselves with using up scraps of paper and cardboard that often came out of the trash. We learned early on that money doesn't grow on trees and self entertainment is the best and the longest lasting entertainment. That training has lasted me my whole life and I still entertain myself easily and I'm never bored.


